
Are you looking for a clear, actionable path to build and scale a profitable ecommerce funnel using ClickFunnels 2.0?


How To Use ClickFunnels 2.0 For Ecommerce
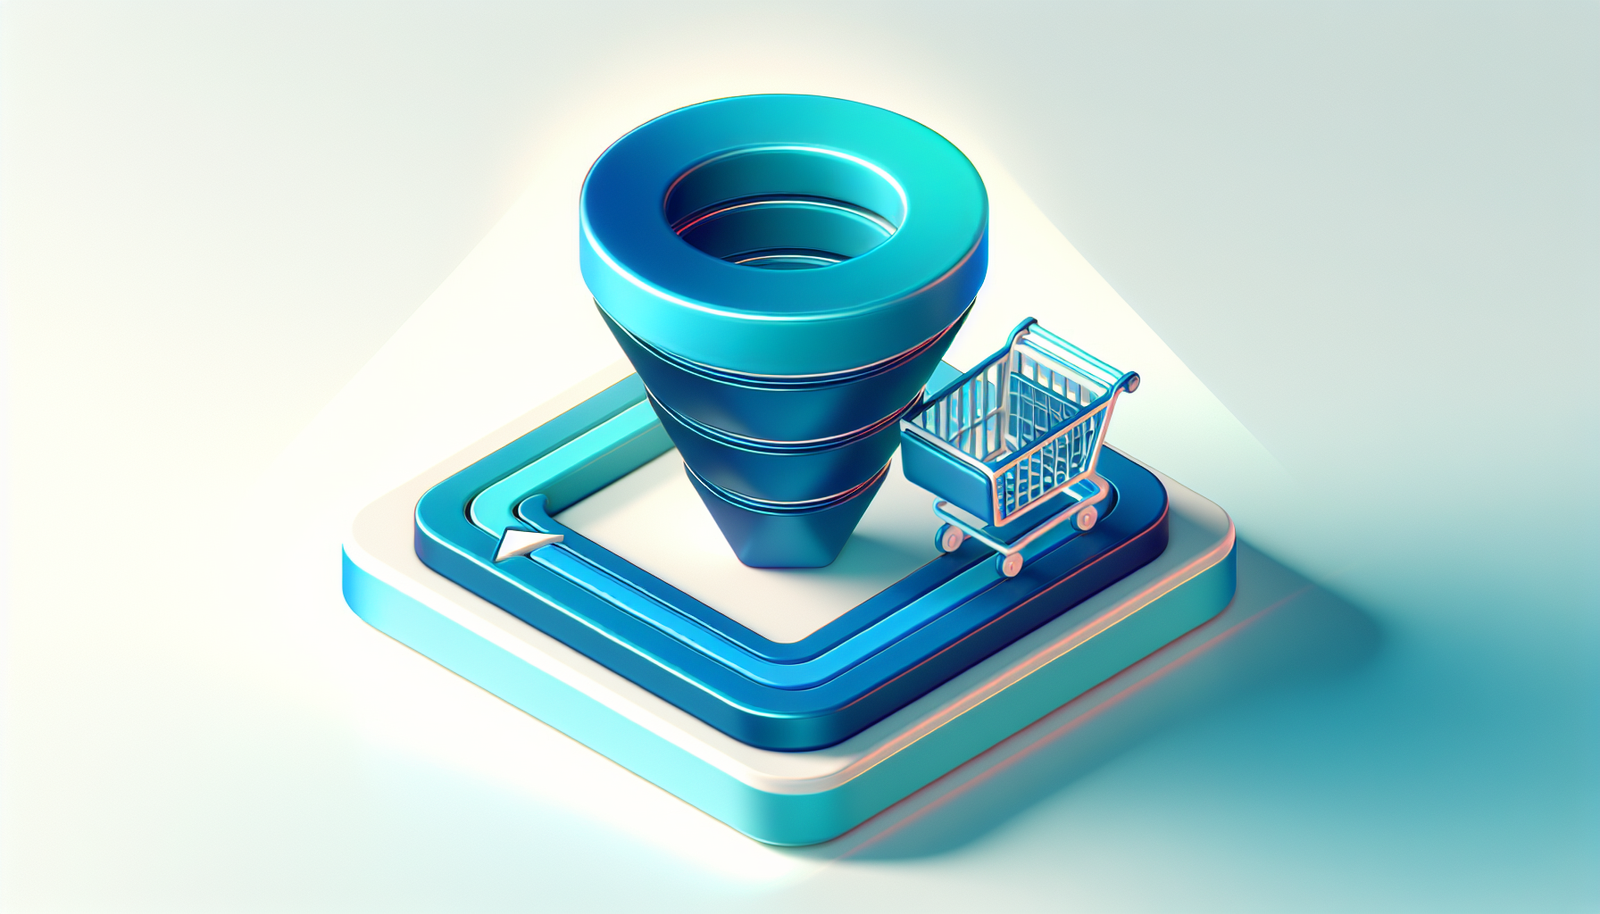
If you want your ecommerce store to outperform simple “browse-and-leave” traffic, you need a system built for conversions. ClickFunnels 2.0 combines a website builder, funnel engine, shopping cart, CRM, email automation, and analytics in one place so you can focus on turning visitors into customers and customers into repeat buyers. By using funnels, you shorten the path to purchase, increase average order value, and capture the data you need to optimize each step.
This guide shows you how to use ClickFunnels 2.0 for ecommerce step by step. You will set up your products, design high-converting pages, connect payments and tax settings, build automations, and implement post-purchase upsells. You will also see the metrics that matter, tactics to increase conversions, and workflows to scale with confidence.
What Makes ClickFunnels 2.0 Different for Ecommerce?
Traditional ecommerce platforms focus on catalogs and navigation. ClickFunnels 2.0 focuses on guided paths that lead to a sale and repeat business. Instead of hoping visitors find the right product, you create intentional sequences that remove friction and provide targeted offers.
With ClickFunnels 2.0 you can build both your brand site and your sales funnels, manage global products, run one-click upsells, and send automated email/SMS follow-ups. You also get a Customer Center for self-serve access to order history and subscriptions, and a visual automation builder that connects actions across your entire business.
Core Funnel Types for Ecommerce
Different offers perform best with different funnel structures. Understanding which funnel to use helps you match the right flow to your product, traffic source, and price point. You can mix and test these formats as you learn what resonates with your audience.
Below are several proven funnel types you can configure in ClickFunnels 2.0. Each one focuses your visitor’s attention on taking a specific action while priming the next step for higher total order value.
Product Launch Funnel
A product launch funnel primes demand and captures orders during a narrow window. You build anticipation with content releases, waitlists, and early-bird incentives that culminate in a dedicated sales page and post-purchase upsells.
This approach works well for limited drops, seasonal lines, and new product introductions. It brings urgency and a narrative arc to your campaign to push prospects to act now.
Sales Letter Funnel (Video or Long-Form)
A sales letter funnel uses a persuasion-first page that teaches, handles objections, and presents the offer. It usually includes a video (VSL) or detailed copy, clear guarantees, FAQs, and a direct checkout.
It suits higher-priced products or categories where education matters. You collect less browsing data but convert at a higher rate because the page is designed solely to get the sale.
Lead Magnet to Tripwire Funnel
A lead magnet funnel captures emails first, then presents a low-cost “tripwire” offer to convert new leads into buyers. Once a prospect purchases the tripwire, you introduce complementary products via order bumps and one-click upsells.
You use this to grow your list inexpensively and train your audience to buy. The economics work by raising your average order value on the first transaction and monetizing the list over time.
Reverse Squeeze to Multi-Step Checkout
This format shows value upfront with minimal gating. Visitors see benefits and proof above the fold and move through a multi-step checkout that collects email first, then shipping and payment.
It helps with cold traffic because it reduces commitment at the start while giving you a way to recover abandoned carts. You build momentum with micro-steps that feel easy to complete.
Webinar or Workshop to High-Value Ecommerce Offer
If you sell bundles, educational kits, or premium packages, a webinar or workshop funnel can warm prospects with a live or recorded session. The presentation frames the problem and the solution, followed by a time-bound offer.
You get higher attention and time-on-page, and you can follow up with those who registered but didn’t buy. For physical-digital hybrids, this format works especially well.
Reorder and Subscription Funnel
Once you have a buyer, you want to lock in predictable revenue. A reorder funnel uses email/SMS reminders and a simplified checkout to encourage replenishment. A subscription funnel offers recurring purchases with incentives and one-click upgrades.
You can use post-purchase and customer center prompts to increase subscriber count and reduce churn. The easier you make reorders, the more consistent your revenue becomes.
Funnel Stages and Goals Overview
Use the following table to map a funnel to its purpose and page sequence. This helps you pick the right structure before you start building.
| Funnel Type | Typical Pages | Primary Goal | Secondary Goal | Best For |
|---|---|---|---|---|
| Product Launch | Teaser -> Opt-in -> Sales -> Checkout -> OTO -> Thank You | Capture prelaunch list and surge purchases | Build urgency and buzz | New product lines, limited drops |
| Sales Letter (VSL/Long-form) | Sales -> Checkout -> OTO -> Thank You | Maximize conversions from warm traffic | Educate and handle objections | Premium or complex products |
| Lead Magnet -> Tripwire | Opt-in -> Low-ticket offer -> Checkout -> OTO -> Thank You | Acquire buyers at break-even | Grow email list | Volume acquisition |
| Reverse Squeeze -> Multi-step Checkout | Sales -> Multi-step Checkout -> OTO -> Thank You | Reduce friction for cold traffic | Collect emails early | Products <$100< />d> |
| Webinar/Workshop | Registration -> Live/Replay -> Sales -> Checkout -> Thank You | High-ticket AOV | Build trust over time | Bundles, premium kits |
| Reorder/Subscription | Email/SMS link -> Short checkout -> Thank You | Increase LTV | Stabilize revenue | Consumables, refills |
Laying the Groundwork: Account, Domains, and Branding
Before creating your first funnel, you need to set up your foundation. Clear branding, a connected domain, and standard policies will reduce friction and help you pass compliance checks with ad platforms and payment processors.
In ClickFunnels 2.0, connect your custom domain, enable SSL, and set your brand kit (colors, fonts, logo). Create universal sections for headers and footers so you maintain visual consistency across funnels, pages, and your site.
Domain and SSL Configuration
Your domain signals trust and affects ad account approvals. Within ClickFunnels 2.0, connect your domain via DNS records and wait for SSL to issue. Once it is active, assign the domain to your primary site and funnel paths.
If you are migrating from another platform, use 301 redirects for high-traffic URLs to preserve tracking and reduce broken links. Keep your slugs short and descriptive to support SEO and ad relevance.
Brand Kit and Universal Sections
Set your typography, color palette, and button styles in one place so every page inherits the same look. Use universal headers and footers to add policy links, contact information, and trust elements.
This makes your funnels feel like a cohesive brand rather than standalone campaigns. It also helps you build faster and reduces errors when your team edits pages.
Product Setup in ClickFunnels 2.0
Products sit at the center of your ecommerce stack. In ClickFunnels 2.0 you can define global products that you attach to multiple funnels or create product variations for a specific funnel. Proper setup ensures inventory tracks correctly and checkout logic works without surprises.
Focus on clean product data first. Your naming, images, variant logic, and price rules determine how smooth your checkout will be and how well your upsells connect to the main offer.
Global Products vs. Funnel-Specific Products
Global products are reusable. You define title, price, variants, shipping, and taxes once and reference them in any funnel. Funnel-specific products exist only in the funnel where you create them, which can be useful for limited-time offers.
Use global products for your core catalog so you can update details in one place. Use funnel-specific products for bundles and special pricing that should not appear elsewhere.
Required Product Attributes and Best Practices
Set each product with the minimum attributes below. Consistent data keeps your accounting, shipping, and promotions aligned.
| Attribute | What You Set | Why It Matters | Best Practice |
|---|---|---|---|
| Title & Subtitle | Clear product name | Matches ads and page copy | Keep consistent across ad, page, and checkout |
| Description | Benefits, materials, care, what’s included | Reduces objections | Lead with benefits; include specs below |
| Images & Video | Main image, angles, lifestyle | Improves conversions | Use 1000px+ images and a short explainer video |
| SKU | Unique identifier per variant | Inventory and reporting | Use a structured SKU schema (e.g., PROD-COLOR-SIZE) |
| Variants | Size, color, bundle, etc. | Accurate selection and price | Limit to meaningful variants; preselect best seller |
| Base Price | USD, EUR, etc. | Clear pricing | Include anchor price if discounting |
| Compare-at Price | Optional higher price | Shows savings | Use only when policy allows and it’s truthful |
| Inventory | Track quantity | Avoid overselling | Buffer stock by 5–10% to prevent cancellations |
| Shipping | Weight, dimensions, methods | Rate calculation | Map methods to regions and delivery times |
| Taxes | Taxable/non-taxable | Compliance | Mark digital vs physical correctly |
| Fulfillment | Manual or integration | Speed and accuracy | Document SOP per product type |
| Product Type & Tags | Category labels | Segmentation | Drive conditional upsells and email logic |
| Custom Fields | Engraving, notes, VAT number | B2B/B2C needs | Validate inputs to prevent mistakes |
Payments, Taxes, and Compliance
Payment and tax setup affects both conversion rate and legal obligations. You want instant acceptance for legitimate buyers and accurate collection of taxes where required. Make sure you test the full purchase flow before sending traffic.
ClickFunnels 2.0 supports popular payment gateways and offers settings for tax regions. Pair gateway features with your internal policies to keep your account in good standing with processors and regulators.
Payment Gateways and Express Checkout
Connect your Stripe account for credit/debit cards and enable Apple Pay and Google Pay where available. You can also connect PayPal for customers who prefer a wallet checkout. Ensure your business details in the gateway match your site branding and policies.
Enable test mode to run transactions with test cards while you build and QA your funnel. Only switch to live mode after you complete successful test orders and refunds.
Taxes and Invoicing
Tax rules vary across regions, and the most reliable way to calculate them is through a dedicated tax solution or your payment processor’s tax features. Stripe Tax, for example, can automatically determine location-based rates and manage VAT/GST collection.
Within ClickFunnels 2.0, mark taxable products and configure the necessary fields to collect information such as VAT numbers where applicable. Provide compliant invoices by including your business legal name, address, tax IDs, and line-item details.
Policies, Terms, and Regulatory Requirements
Have accessible links to privacy, terms, and refund policies in your footer and at checkout. Show contact details and expected response times. Use a cookie consent banner if you serve traffic from regions that require it.
For data protection, only collect the data you truly need. If you run SMS campaigns, follow opt-in and opt-out requirements. For email, ensure proper unsubscribe links and a physical address in your emails.
Building Your First Ecommerce Funnel Step by Step
With the groundwork set, you can assemble your first funnel. Think of it as a guided path that turns attention into action and action into a higher-value purchase. Map your offer, connect your products, and align your copy with the specific audience you target.
This step-by-step sequence will take you from an empty funnel to a fully functioning system that can process payments, capture emails, and trigger automations.
Step 1: Clarify Your Offer and AOV Targets
Decide exactly what you want someone to buy and what you want your average order value to be. If your main product is $49, plan an order bump at $9–$19 and an upsell at $29–$79 to push AOV into the $80–$120 range.
Define your core promise, the main differentiators, and the top 3 objections. Your page design and copy should answer those objections before the customer reaches the checkout.
Step 2: Create a New Funnel and Choose a Template
In ClickFunnels 2.0, add a new funnel and select a template closest to your goal. Templates include prebuilt sections for headlines, benefits, social proof, and checkout elements.
You will customize each section with your brand kit and product details. Keep layouts simple and focused on the buying decision rather than general browsing.
Step 3: Add Pages and Set the Path
Add the following pages to your funnel and define the sequence:
- Sales Page (or product page)
- Checkout (one-step or multi-step)
- Order Bump (configured on the checkout page)
- One-Time Offer (post-purchase upsell)
- Downsell (optional)
- Order Confirmation (thank you)
- Customer Center access link
Assign the correct next-step path for accepted/declined upsells so customers flow smoothly to the confirmation page after making a decision.
Step 4: Attach Products and Price Rules
On the checkout step, attach your global product or create a funnel-specific product. Configure variants, shipping zones, taxes, and inventory tracking. Add a discount code if you need a launch promo.
For the order bump, add a complementary product that requires no additional explanation. For the upsell, offer a bundle, subscription upgrade, or premium option with one-click acceptance.
Step 5: Customize Copy and Visuals for Conversion
Use a clear headline that promises a specific outcome. Follow with a concise value stack: main benefits, what’s included, and why it works. Include scannable bullets, strong visuals, and short explainer videos if appropriate.
Add trust markers: reviews, ratings, guarantees, secure checkout badges, and media mentions. Close with a single, prominent call-to-action that repeats near the fold and before the footer.
Step 6: Configure Checkout and Order Bumps
Choose one-step or multi-step checkout. Multi-step can increase perceived momentum, while one-step minimizes clicks for warmer traffic. Use address fields only when shipping is necessary and avoid collecting irrelevant data.
Add an order bump that you can explain in a sentence. Use a checkbox with a headline such as “Add protective case for 35% off” and show a small image. Keep the price lower than the main product.
Step 7: Build Post-Purchase Upsells (OTOs)
Create a dedicated upsell page that loads immediately after payment authorization. Emphasize that acceptance is one click and no re-entry of payment details is required. Keep the page concise and repeat the strongest benefit.
Add a downsell for those who decline, ideally at a reduced price or with a different value angle. Limit the chain to one upsell and one downsell initially to keep the experience efficient.
Step 8: Set Up Order Confirmation and Customer Center
Your confirmation page should clearly show: order number, product details, next steps, and expected delivery or access instructions. Include support contact information and a link to your Customer Center for self-service.
Inside the Customer Center, customers can see order history, manage subscriptions, and access digital products. This reduces support tickets and helps retention.
Step 9: Enable Tracking and Pixels
Install your Facebook Pixel, TikTok Pixel, and Google Analytics 4 (GA4) on your funnel. Map events such as PageView, ViewContent, AddToCart (if used), InitiateCheckout, Purchase, and custom events for bump/upsell acceptance.
Use consistent UTMs on your ads and emails so you can segment performance by funnel, ad set, and creative. Verify that events fire correctly before scaling traffic.
Step 10: Test in Sandbox, Then Switch to Live
Run orders in test mode, including upsell accept/decline paths and refunds. Test card declines and address mismatches to see how errors display. Confirm that emails and workflows trigger correctly.
Once everything passes QA, switch to live mode, place a small real order, and confirm that funds settle and receipts look correct. Only then should you increase traffic volume.
Checkout Optimization and Conversion Boosters
The checkout is where you win or lose a high percentage of revenue. Every field you add or remove, every microcopy change, and every trust element can shift your conversion rate and AOV. Treat this page as a product in itself.
Your goal is to communicate security, reduce friction, and make value unmistakable. In most cases, fewer fields, clear error handling, and visible trust signals increase conversions.
Essential Checkout Elements
To optimize your checkout, consider the following:
- Minimal fields: Collect only what you need to process the order and deliver.
- Express payment options: Enable Apple Pay and Google Pay through Stripe where available.
- Social proof: Show star ratings and a short testimonial near the form.
- Guarantees: Place a guarantee seal and a brief policy summary close to the button.
- Trust badges: Display payment icons and security messages without clutter.
- Cart summary: Show product, variant, price, quantities, and applied discounts clearly.
Ensure that order totals update instantly when customers change variants or apply codes. Clear feedback reduces abandonment at the final step.
Order Bump Structure and Copy
An order bump should be:
- Relevant: A logical add-on to the main product.
- Low friction: Explain in one sentence.
- Low price: Typically 10–30% of the main item’s price.
- Visual: Include a small image and benefit-driven headline.
If your main product is a water bottle, your bump could be a cleaning kit or custom sleeve. Frame it as protection or enhancement, not a new decision that requires extensive thought.
A/B Testing Your Checkout
Use ClickFunnels 2.0’s split testing to compare:
- One-step vs multi-step checkout
- With vs without order bump
- Short vs long guarantee copy
- Different button microcopy (e.g., “Complete Secure Order” vs “Place Order”)
- Presence of trust badges and review snippets
Set a clear hypothesis, run for a statistically valid sample size, and track both conversion rate and AOV. A variant that reduces conversion but substantially increases AOV might still be the winner.
Post-Purchase Upsells and Downsells
The moment after purchase is a high-trust window where you can ethically offer more value. Post-purchase upsells with one-click acceptance are the fastest way to increase AOV without raising ad spend.
Your tone should be consultative, aligning the upsell with the customer’s intent. Avoid overwhelming them with too many choices or unrelated products.
Designing an Effective OTO Page
A high-performing OTO page should include:
- Headline tied to the original purchase outcome
- One clear offer with a simple price
- Bulleted benefits and what’s included
- A short testimonial or proof element
- One-click accept and a no-thanks link
Limit the copy to what is essential. The customer already trusts you enough to buy; now you are presenting the logical next step.
Smart Downsell Approaches
If someone declines the upsell, present an alternative that reduces risk:
- Smaller quantity or trial size
- Payment plan if applicable
- Lower price for fewer features
- Different but related product
Keep it to one downsell. The experience should feel respectful, not pushy. The goal is to save part of the upsell revenue without creating decision fatigue.


Fulfillment, Shipping, and Inventory
Fulfillment can make or break your customer satisfaction and margins. Your funnel promises must match your operational capacity, and your shipping settings must align with product weight, size, and delivery expectations.
Set clear expectations on delivery windows and provide tracking. For digital products, ensure immediate access and simple instructions.
Physical Product Fulfillment
Define shipping zones and methods with transparent pricing. If you offer free shipping thresholds, call them out on the sales page and in the cart summary to encourage higher order values.
For fulfillment, you can connect to third-party logistics (3PL) systems using integrations or automation tools. Many sellers trigger order exports to services like ShipStation or to their warehouse management tools through Zapier, webhooks, or custom middleware. Keep your SKU data synchronized to prevent mispicks.
Digital Product Delivery and Memberships
For digital goods, grant access on the confirmation page and via email. Use ClickFunnels 2.0 membership areas and the Customer Center to house content, downloads, or license keys. Provide onboarding steps and a quick-start guide so customers use the product immediately.
If your offer includes both physical and digital components, state which parts arrive instantly and which ship later. This reduces support tickets about “missing items.”
Inventory and Backorder Policies
Track inventory for each variant and set thresholds for low-stock alerts. If you allow backorders, communicate estimated ship dates before payment.
Keep a buffer stock for your bestsellers so promotions do not cause oversells. Build an internal cadence to reconcile inventory weekly or connect your systems to update in near real time.
Email, SMS, and Automation in ClickFunnels 2.0
Automation captures lost revenue, nurtures relationships, and unlocks lifetime value. In ClickFunnels 2.0, you can build Workflows that trigger on events such as page visits, purchases, upsell acceptances, and failed payments.
Plan email and SMS flows to engage without overwhelming. Your messaging should be timely, relevant, and tied to clear actions.
Core Automations to Set Up
Start with these essential flows:
- Abandoned Checkout: Send a reminder within 1–2 hours, then again at 24 hours with a helpful prompt.
- Post-Purchase Onboarding: Provide order details, tips to get value, and a subtle upsell or reorder cadence.
- Review Request: Ask for a review 7–14 days after delivery with simple instructions.
- Win-Back: Re-engage customers who have not purchased in 60–90 days with a personalized offer.
- Product Education Series: A short series teaching usage, care, and advanced tips.
- Subscription Dunning: If you run subscriptions, configure failed payment and card expiration sequences through your payment processor, and reflect them in your ClickFunnels workflows.
Make subject lines specific and customer-centric. Include an obvious CTA and avoid sending too many messages in a short window.
Segmentation and Personalization
Use tags and conditions to segment by:
- Product purchased or category
- Order value and frequency
- Geography and time zone
- Behavior (page views, clicked content, upsell acceptance)
Personalize by referencing the product they bought, the problem they solved, and the next logical step. Even small segments can significantly lift open and conversion rates.
Deliverability and Sending Domains
Authenticate your sending domain with SPF and DKIM and consider DMARC for better protection. Warm up new sending domains by gradually increasing volume to avoid spam filters.
Keep lists clean by removing hard bounces and chronic non-openers. Use clear unsubscribe mechanics to maintain sender reputation.
Analytics and KPIs to Track
You cannot optimize what you do not measure. ClickFunnels 2.0 provides funnel-level analytics such as page conversion rate, step completion, and revenue per visitor. Combine those with ad platform data and GA4 for a complete view.
Track metrics at both the page and funnel level, and segment by traffic source. You need to know not just if the funnel works, but for whom and from where.
Core Ecommerce Funnel Metrics
Use the following table to define your measurement framework.
| Metric | Definition | Target/Note |
|---|---|---|
| Conversion Rate (CVR) | Purchases / Unique visitors | Aim for 2–5%+ depending on price and traffic quality |
| Average Order Value (AOV) | Revenue / Number of orders | Increase with bumps and OTOs |
| Earnings per Click (EPC) | Revenue / Clicks | Key for affiliate and paid media |
| Cart Abandonment Rate | Started checkout but did not purchase | Recover through email/SMS flows |
| Upsell Take Rate | Upsell acceptances / Purchases | 10–30% is typical with aligned offers |
| Refund Rate | Refunds / Orders | Keep low with honest copy and product quality |
| Customer Acquisition Cost (CAC) | Ad spend / New customers | Compare against gross margin |
| Lifetime Value (LTV) | Net revenue per customer over time | Increase with reorders and subscriptions |
| Return on Ad Spend (ROAS) | Revenue / Ad spend | Track per traffic source and campaign |
| Email Revenue Share | Email-attributed revenue / Total revenue | Healthy stores see 20–40% from email |
Attribution and Tagging
Define your UTM naming conventions and apply them consistently across ads and emails. In GA4, set up conversions for key funnel steps and import cost data where possible.
Use your pixels to create retargeting audiences based on funnel step completion. For example, retarget sales page viewers who did not initiate checkout, and checkout initiators who did not purchase.
Templates and Copy Frameworks
Good design helps, but copy drives decisions. Use proven frameworks to structure your pages so your message is clear, persuasive, and benefit-focused. Keep your tone customer-centric and outcome-driven.
Short beats long unless price or complexity requires more detail. Always match your claims with proof, whether through testimonials, demos, or data.
Sales Page Copy Structure
You can follow this simple framework:
- Headline: Promise the outcome your customer wants
- Subhead: Clarify who it is for and why it works
- Benefits: Bulleted list focusing on results
- Proof: Testimonials, case studies, or social proof
- Mechanism: Briefly explain how it works
- Offer Stack: What’s included and the value of each part
- Price and Guarantee: Transparent pricing and risk reversal
- FAQ: Handle objections concisely
- CTA: Prominent button with action-oriented text
Use direct language and avoid jargon. If you can show your product in action with a short video, you reduce the need for lengthy explanations.
Checkout Microcopy and Buttons
Button copy should reduce anxiety and emphasize safety:
- “Complete Secure Order”
- “Get Instant Access”
- “Ship My Order”
- “Yes, Add This to My Order” (for bumps/upsells)
For guarantees, a sentence or two is enough: “Try it for 30 days. If you are not satisfied, contact support for a full refund.”
Email Templates
Structure your emails with clarity:
- Subject: Benefit or curiosity tied to the product
- First line: Restate the value and context
- Body: One main idea, short paragraphs, and a single CTA
- Footer: Contact info, unsubscribe, and brand consistency
For abandoned checkout, acknowledge real reasons someone might pause and offer help rather than immediate discounts. You can introduce an incentive later if needed.
SEO and Content with ClickFunnels 2.0
Even though funnels are built for conversions, your pages can still benefit from search visibility. Set basic SEO metadata, use descriptive URLs, and ensure pages load quickly. For broader discovery, use the blog feature in ClickFunnels 2.0 to publish helpful content that routes to your funnels.
A content-to-funnel strategy positions your brand as helpful and trustworthy while giving readers a next step. Tie informational posts to lead magnets or relevant product offers.
On-Page SEO Basics
Set page titles, meta descriptions, and Open Graph tags. Use H1, H2, and H3 headings logically, and write alt text for images. Keep your main keywords in headlines and early in the copy without stuffing.
Compress images and avoid heavy scripts. Faster pages convert better and rank higher. Keep your slugs clean, for example, “/bamboo-water-bottle” rather than “/page123”.
Content That Fuels Funnels
Publish how-to guides, comparisons, and buyer’s guides. Each article should include a clear CTA to a related funnel. For example, a guide on hydration could link to your water bottle funnel with a special bundle offer.
Use internal links to move readers toward purchase. In your blog posts, make your CTAs visually consistent with your funnel buttons.
Integrations and Tech Stack
Your ecommerce operation touches multiple systems: payments, email, fulfillment, analytics, and customer support. ClickFunnels 2.0 centralizes many of these functions and connects with others to fill gaps.
Choose integrations that reduce manual work and keep data in sync. Aim for a single source of truth for orders and inventory, and a clean pipeline for your analytics.
Payments, Email, and Fulfillment
- Payments: Connect Stripe for cards and wallet payments, and add PayPal as an alternative.
- Email/SMS: Use ClickFunnels 2.0 Workflows for messaging or connect to your preferred email/SMS provider if you have established deliverability there.
- Fulfillment: Automate order export to your 3PL or shipping software via Zapier, webhooks, or native connections when available.
Keep your customer support system linked by sending order details to your helpdesk. Your support team should see the full context when handling tickets.
Using Zapier, Make, or Webhooks
Automations can trigger on events such as order created, upsell accepted, or refund processed. Send data to spreadsheets for reporting, update your inventory system, or notify Slack for large orders.
Map fields carefully to avoid mismatches. Test with sample data and build error handling, such as alerts when a task fails, so you do not miss orders.
Running ClickFunnels with Shopify or Other Stores
Some brands use ClickFunnels 2.0 for acquisition funnels and maintain a Shopify store for catalog browsing and back-office operations. In that setup, you route cold traffic to funnels for higher conversions and sync orders to Shopify for fulfillment and customer accounts.
If you choose this approach, define which system is the master for inventory, pricing, and product data. Prevent channel conflicts by aligning SKUs and keeping offer-specific prices contained to the funnel.
Security, Privacy, and Reliability
Customers need assurance that their data is safe and that your site is stable. ClickFunnels 2.0 provides SSL and secure payment processing through integrated gateways. Your policies and internal practices complete the picture.
Protect your brand and your customers by working with authenticated domains, following consent standards, and maintaining a clear support presence.
Data Protection and PCI
Payment data is handled by your payment gateway, which is PCI compliant. Do not store card details in other systems. Limit access to customer data to staff who require it and maintain role-based permissions inside your account.
If you collect personal data beyond what is necessary for orders, justify the need and update your privacy policy accordingly. Give customers control over their communication preferences.
Uptime and Version Control
Before major campaigns, verify the health of your funnels and test on multiple devices and browsers. Maintain duplicate funnels or pages as backups so you can roll back quickly if you encounter an issue.
Use a change log for your team so everyone knows what changed, when, and why. Schedule edits during off-peak times when possible.
Testing and QA Before Going Live
A structured QA process prevents lost revenue and poor customer experiences. Walk through your funnel on different devices and test edge cases such as declined cards, invalid addresses, and coupon errors.
Use the checklist below to confirm you covered critical areas.
Pre-Launch QA Checklist
| Area | Test | Pass Criteria |
|---|---|---|
| Payments | Test purchase in sandbox and live (small real order) | Order processes, funds settle, receipt sent |
| Upsells/Downsells | Accept and decline paths | Correct routing and charges |
| Order Bump | Add/remove bump | Totals update, bump added to order |
| Taxes | Correct tax applied per region | Accurate calculation and display |
| Shipping | Rates and options display correctly | Method chosen appears on order |
| Emails/SMS | Abandoned cart and post-purchase | Correct timing, links, personalization |
| Pixels/Events | Ads manager and GA4 event fires | PageView, ViewContent, Purchase tracked |
| Mobile | Full funnel on multiple devices | No layout or input issues |
| Policies | Links visible at checkout and footer | Open and load correctly |
| Customer Center | Orders display, access granted | Customers can log in and view items |
Document anything you adjust and retest before sending traffic. Small fixes can produce big wins.
Scaling Your Funnel
Once your funnel is converting, you can scale traffic and operations. Move methodically so your systems and cash flow keep pace with demand. Scaling is not just about ad budget; it is also about speed, reliability, and post-purchase performance.
Focus on your constraints: page speed, fulfillment capacity, and customer support. Removing bottlenecks will improve your ability to sustain higher volumes.
Traffic and Budget Scaling
Increase budgets in controlled increments while monitoring ROAS, CAC, and AOV. Diversify traffic sources to reduce dependency on one channel. Build retargeting layers based on funnel steps to capture warm prospects efficiently.
Refine your creatives and landing angles. Rotate offers to audience segments and use lookalike or similar audiences seeded with high-value customers.
Page Speed and Performance
Compress images, limit animations, and avoid unnecessary third-party scripts. Test your pages on mobile networks and older devices. Faster pages yield better ad quality scores and higher conversion rates.
Consider duplicating a proven funnel to test a different product angle with minimal changes, rather than building from scratch. This keeps performance consistent across tests.
Operations and Support
Scale your support team’s capacity with templated replies, knowledge base articles, and macros. Set SLAs for response time and resolution. Monitor refund and chargeback rates closely and adjust product quality or expectations as needed.
Forecast inventory based on recent sales velocity and ad plans. Negotiate better rates with suppliers and carriers as volume grows.
Common Pitfalls and How to Avoid Them
Even smart marketers make avoidable mistakes in their funnels. Awareness of these pitfalls helps you correct them quickly or avoid them entirely.
Keep your processes simple, your data consistent, and your customer’s experience at the center of every decision.
Pitfall 1: Overcomplicating the Funnel
Too many steps or offers can confuse customers. Start with a straightforward path: sales page, checkout with one order bump, one upsell, and a confirmation page. Expand only if data supports it.
Complexity increases the chances of technical issues and reduces clarity in your analytics. Simplicity scales more reliably.
Pitfall 2: Inconsistent Messaging and Visuals
If your ads, pages, and checkout feel disconnected, you increase friction. Use the same headline promise, imagery, and color palette across your assets. Reassure customers that they are in the right place at each step.
Consistency builds trust and keeps momentum high through the buying journey.
Pitfall 3: Hidden Fees and Surprises
Unexpected shipping costs or taxes at the final step cause abandonment. Communicate total costs early and consider free shipping thresholds that align with your AOV goals.
If additional fees are unavoidable, explain why and show value in the total package.
Pitfall 4: Poor Tracking and Attribution
Missing or misfiring events lead to flawed decisions. Validate your pixels and GA4 events, keep UTM tags clean, and verify that server-side tracking (if used) matches client-side events.
Better data means better scaling decisions and faster iterations.
Pitfall 5: Neglecting Post-Purchase Engagement
If you stop at the first sale, you leave money on the table. Set reorder reminders, education series, and loyalty incentives. Use the Customer Center to encourage repeat purchases and subscription upgrades.
Your best customers are those who already trust you; serve them well and revenue compounds.
90-Day Implementation Plan
A structured plan keeps you moving and ensures you cover essentials without getting stuck in perpetual tinkering. Use this 90-day roadmap to launch and optimize with discipline.
The goals are to build your first funnel, validate product-market fit, and scale while keeping systems stable.
Week-by-Week Milestones
| Weeks | Focus | Key Outcomes |
|---|---|---|
| 1–2 | Foundation | Domain connected, brand kit set, policies live |
| 3–4 | Product Setup | Global products, variants, pricing, shipping, taxes |
| 5–6 | Funnel Build | Sales page, checkout with bump, upsell, confirmation |
| 7 | Tracking | Pixels and GA4 installed; test events verified |
| 8 | Automations | Abandoned cart, post-purchase, review request flows |
| 9 | Soft Launch | Test orders, live purchase, small ad spend |
| 10–11 | Optimization | Split tests on checkout, tweak copy and offer |
| 12 | Scale | Increase budget, expand retargeting, add a second funnel |
At the end of 90 days, you should have a stable funnel with baseline metrics and a process for ongoing testing. From here, your focus shifts to incremental gains and operational efficiency.
FAQ: ClickFunnels 2.0 for Ecommerce
A few frequently asked questions can clarify common concerns and help you move forward with confidence. Use these answers to align your technical setup and strategy.
Can you run a full store or only funnels in ClickFunnels 2.0?
You can run both. ClickFunnels 2.0 includes a site builder, blog, and customer center in addition to funnels. Many brands use a hybrid approach with a brand site and dedicated funnels for promotions and cold traffic.
For complex catalogs with thousands of SKUs, you may prefer a separate catalog system while keeping funnels in ClickFunnels 2.0 for campaigns.
How do you handle subscriptions?
Set products as subscriptions in your payment gateway and connect them through ClickFunnels 2.0. Offer subscription upgrades as post-purchase upsells and manage dunning through your gateway. Provide a simple path in the Customer Center to pause, skip, or cancel if applicable.
Transparent control lowers churn and increases trust.
What if you already use another email platform?
You can keep your current email platform and integrate it using Zapier or native connections where available. Start by letting ClickFunnels 2.0 handle transactional emails while your marketing emails remain in your existing tool, then consolidate later if it makes sense.
Make sure you avoid duplicate sends by coordinating segments and suppressions.
How many upsells should you use?
Start with one upsell and one downsell. Test acceptance rates and customer feedback. If your metrics support it, you can introduce a second upsell, but keep the experience respectful and quick.
Quality beats quantity in post-purchase offers.
Should you use one-step or multi-step checkout?
Test both. Multi-step checkouts can increase form completion because they feel easier to start, while one-step checkouts can convert better for warm audiences. Your product, traffic source, and average order value will influence which wins.
Let your data decide the best approach.
Final Thoughts: Your Next Steps
You now have a complete, professional playbook to use ClickFunnels 2.0 for ecommerce. With a solid foundation, clear offers, optimized checkout, and smart automations, you can increase conversions and customer lifetime value without relying only on more ad spend.
Your next step is to build one focused funnel, connect your products, and launch with a modest budget. Monitor your KPIs, run structured tests, and use post-purchase offers and email flows to capture more revenue. With a disciplined process, your ecommerce funnels will compound results over time and give you a scalable engine for growth.
